6X Multispectral Sensor Data Offload Process
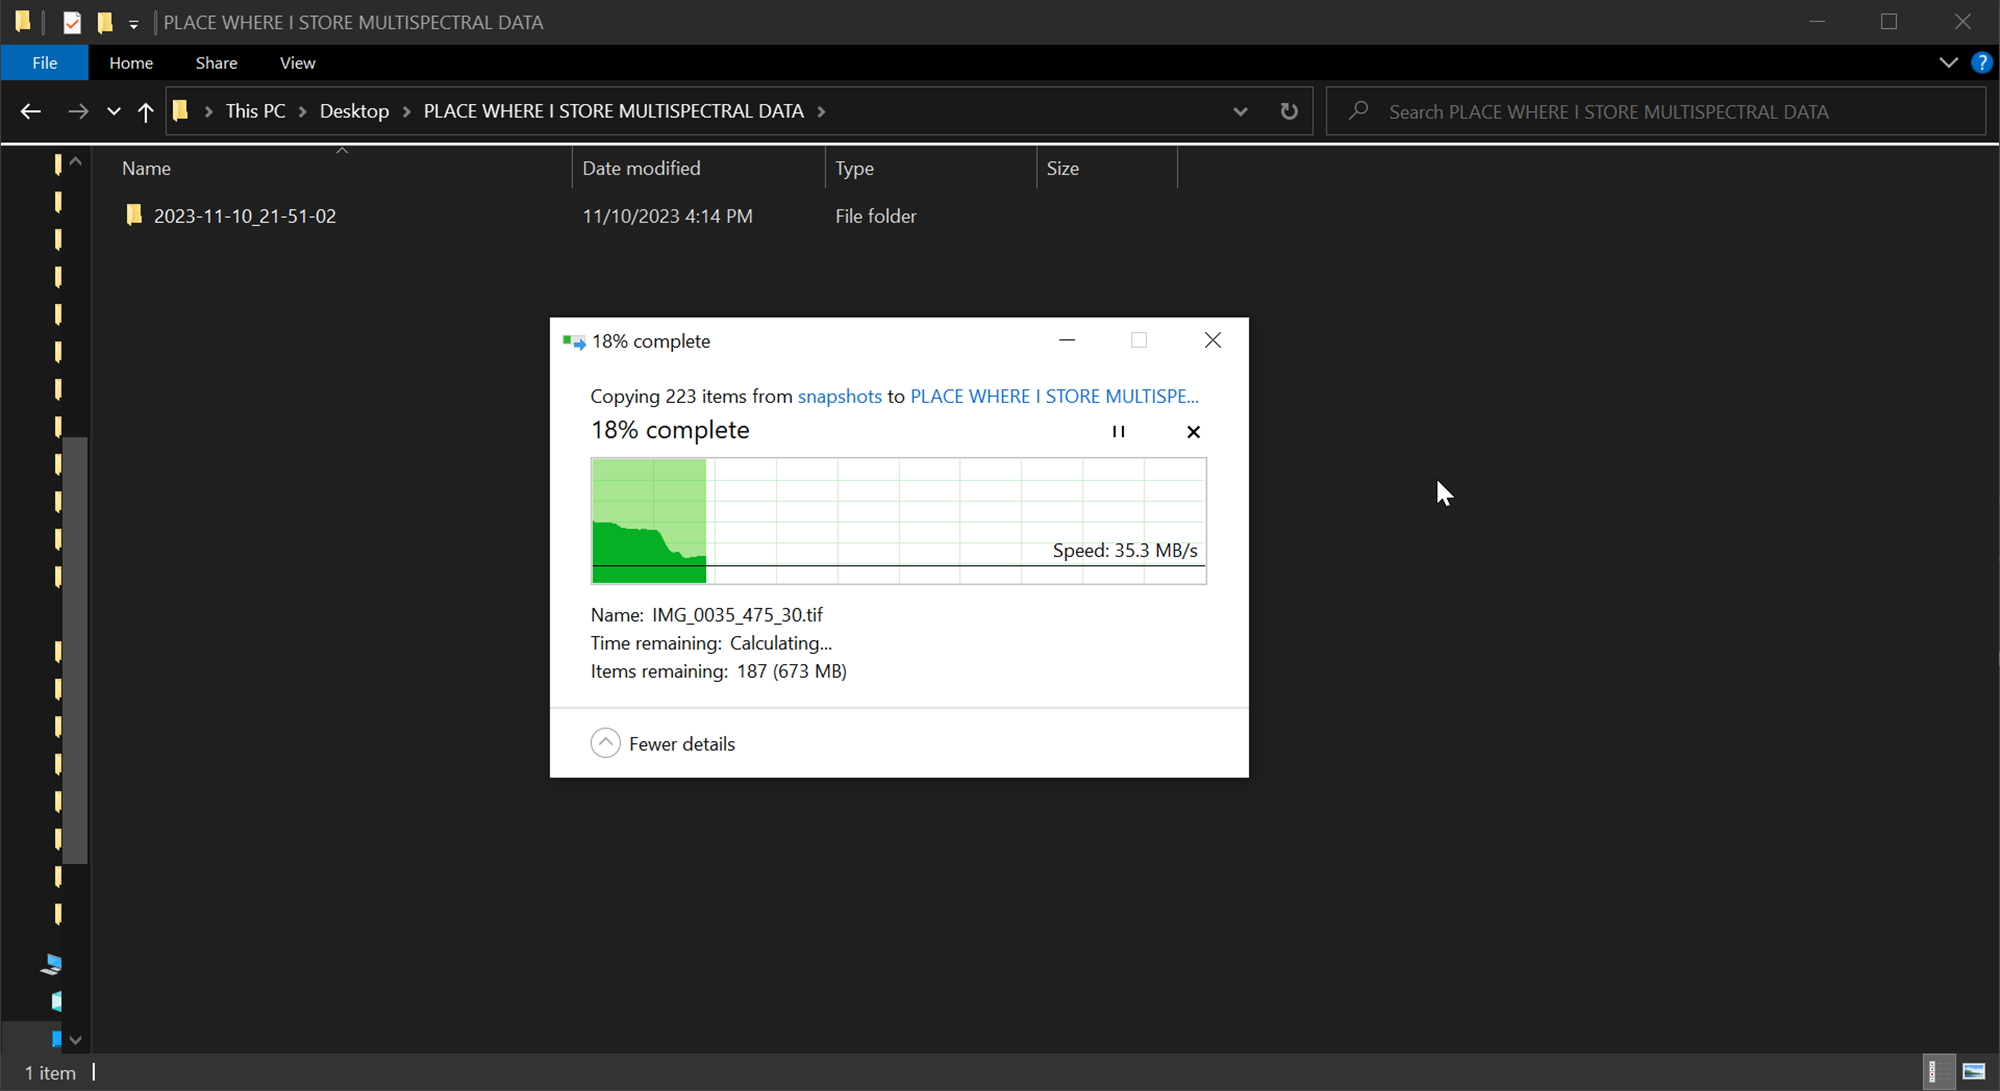
The 6X stores the imagery on an internal solid state hard drive that is not removable from the sensor. Use the process outline below to access the collected data.
Imagery is NOT stored on the micro SD card.
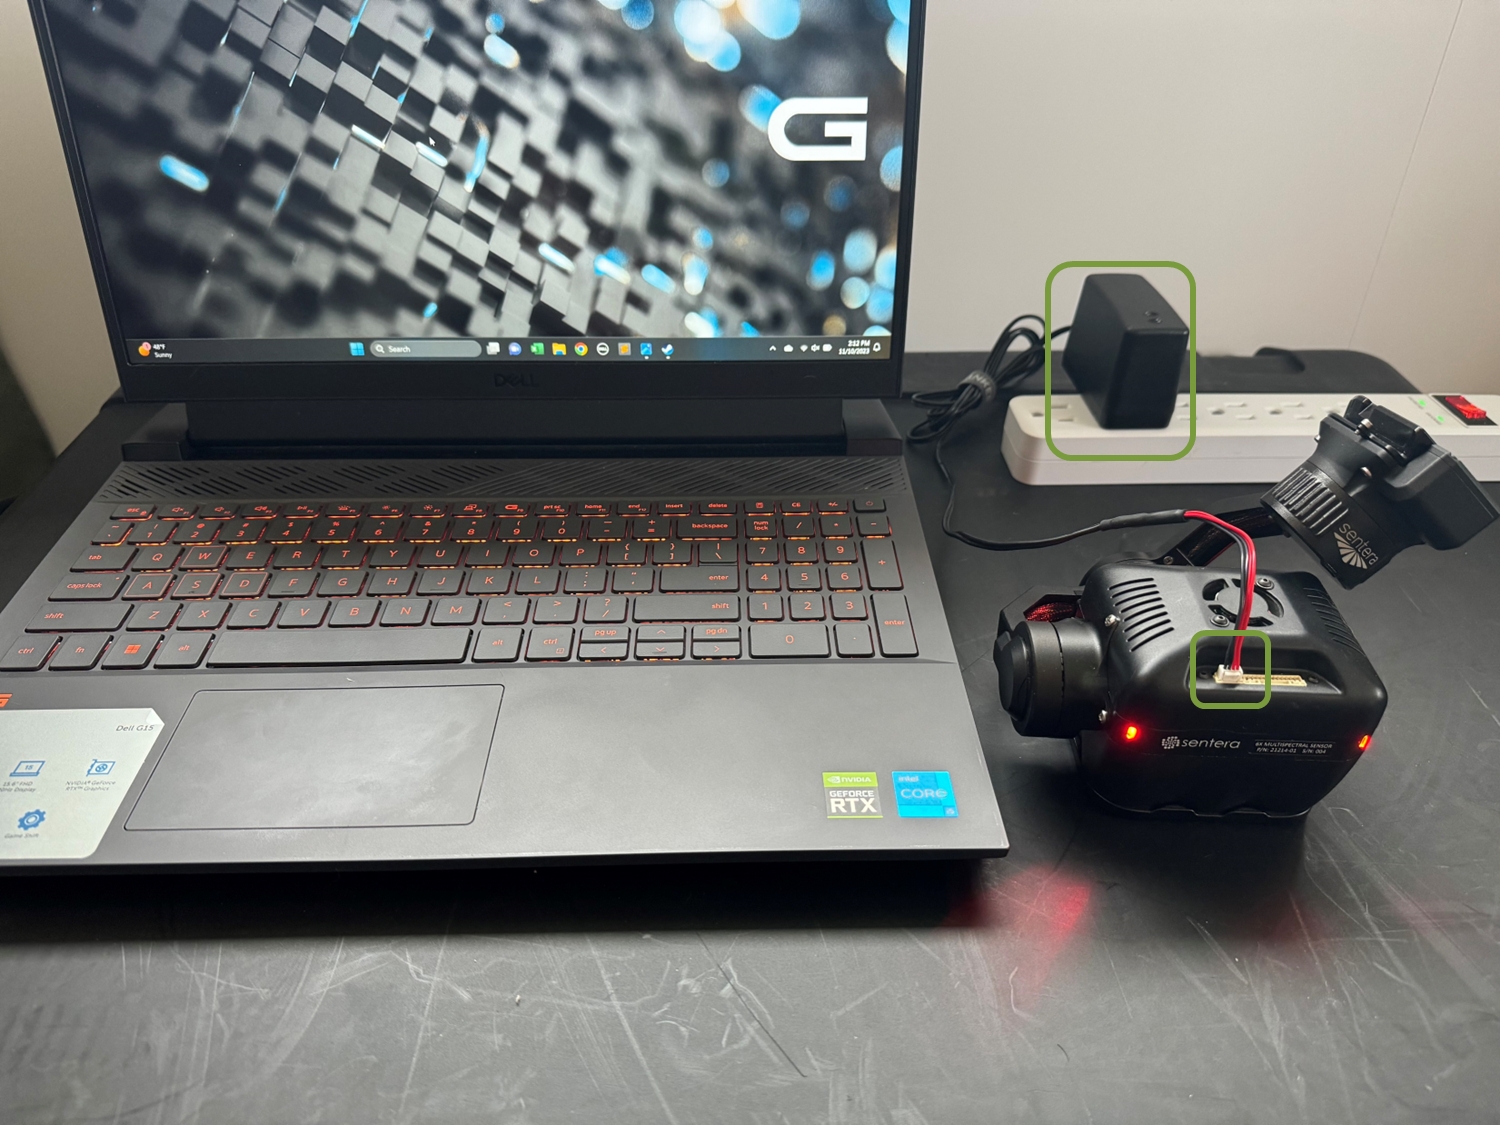
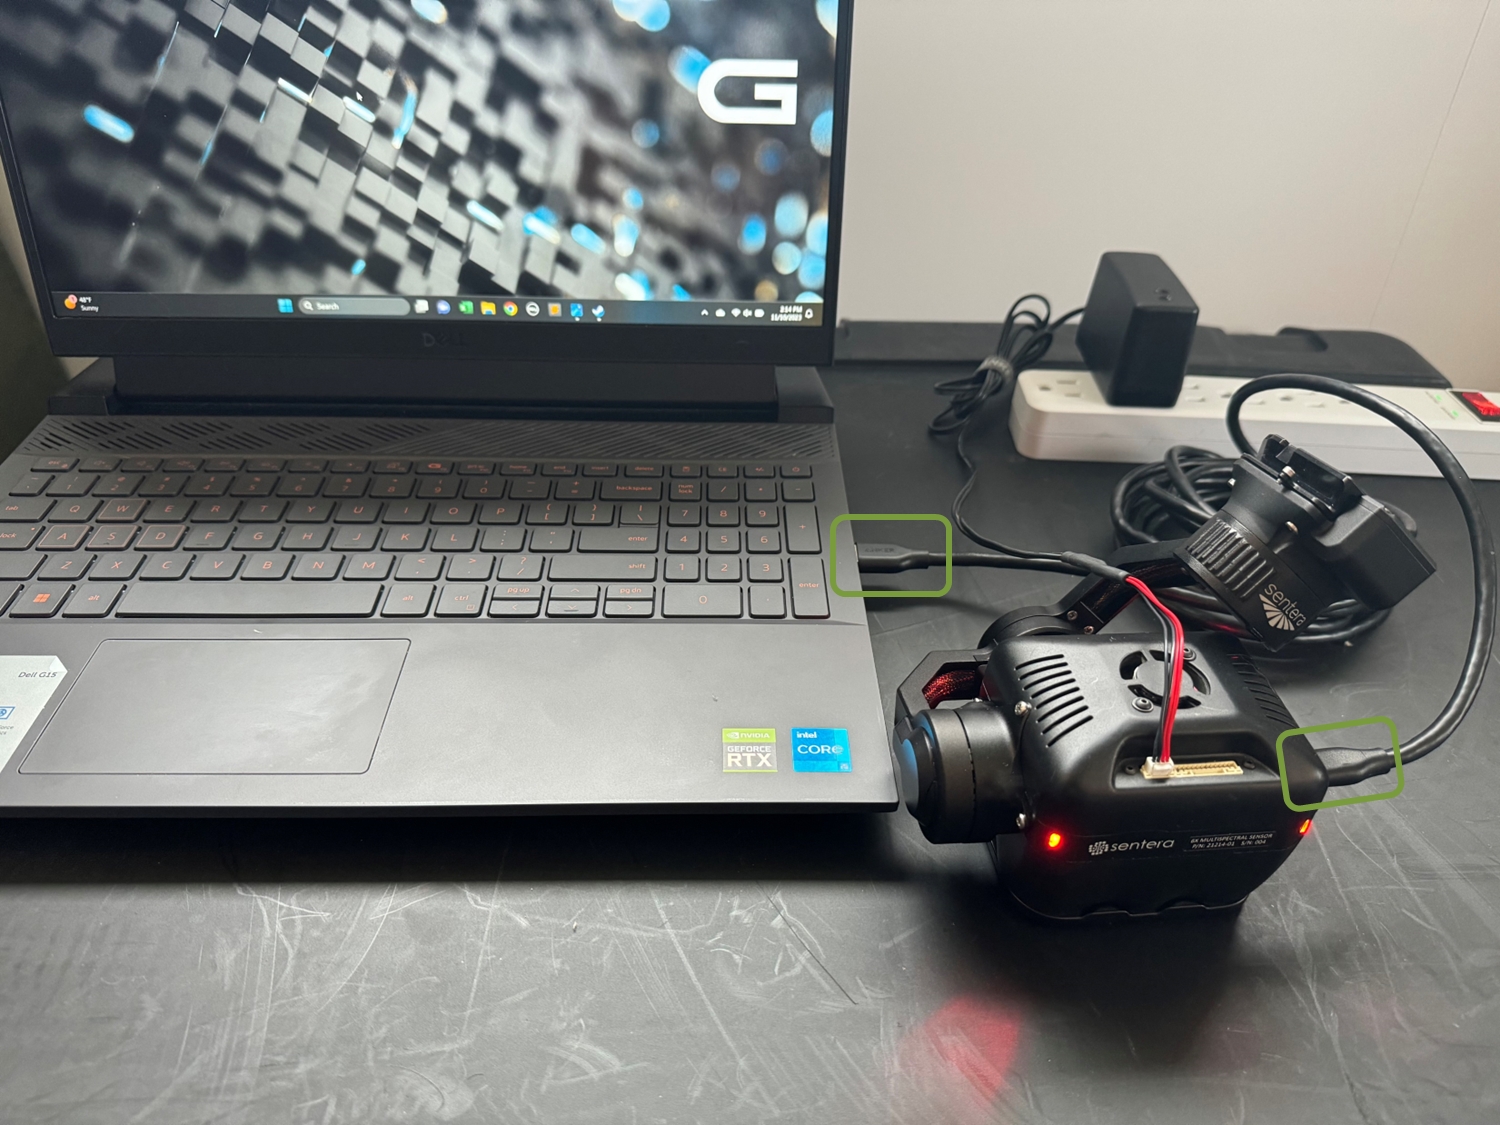
Power the 6X using the AC adapter or keep it attached to the aircraft and turn the aircraft on.
When using the AC power supply, connect the cable to the 6X first, then connect the adapter to the outlet.
For OEM sensor configurations, Ethernet connectivity is also available on the 8-pin J4 connector.
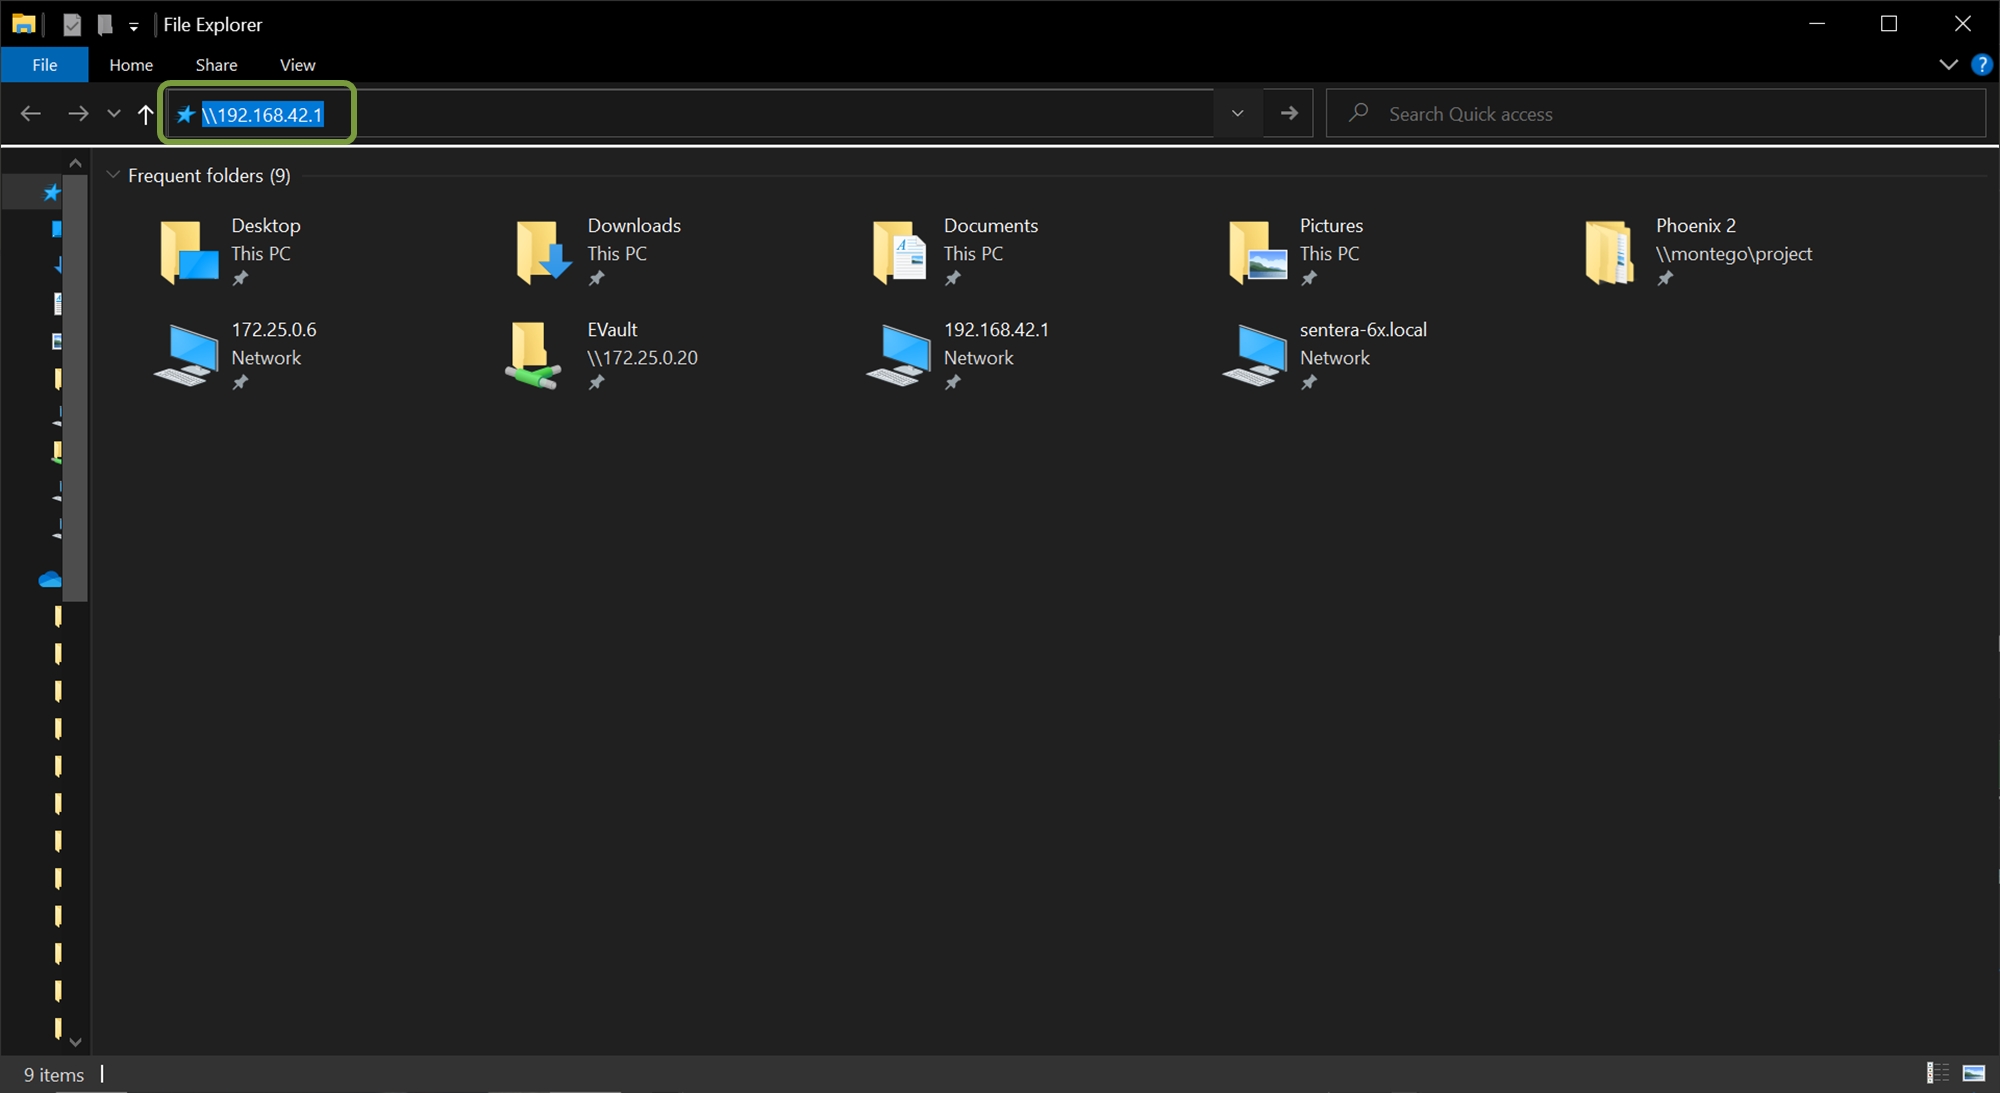
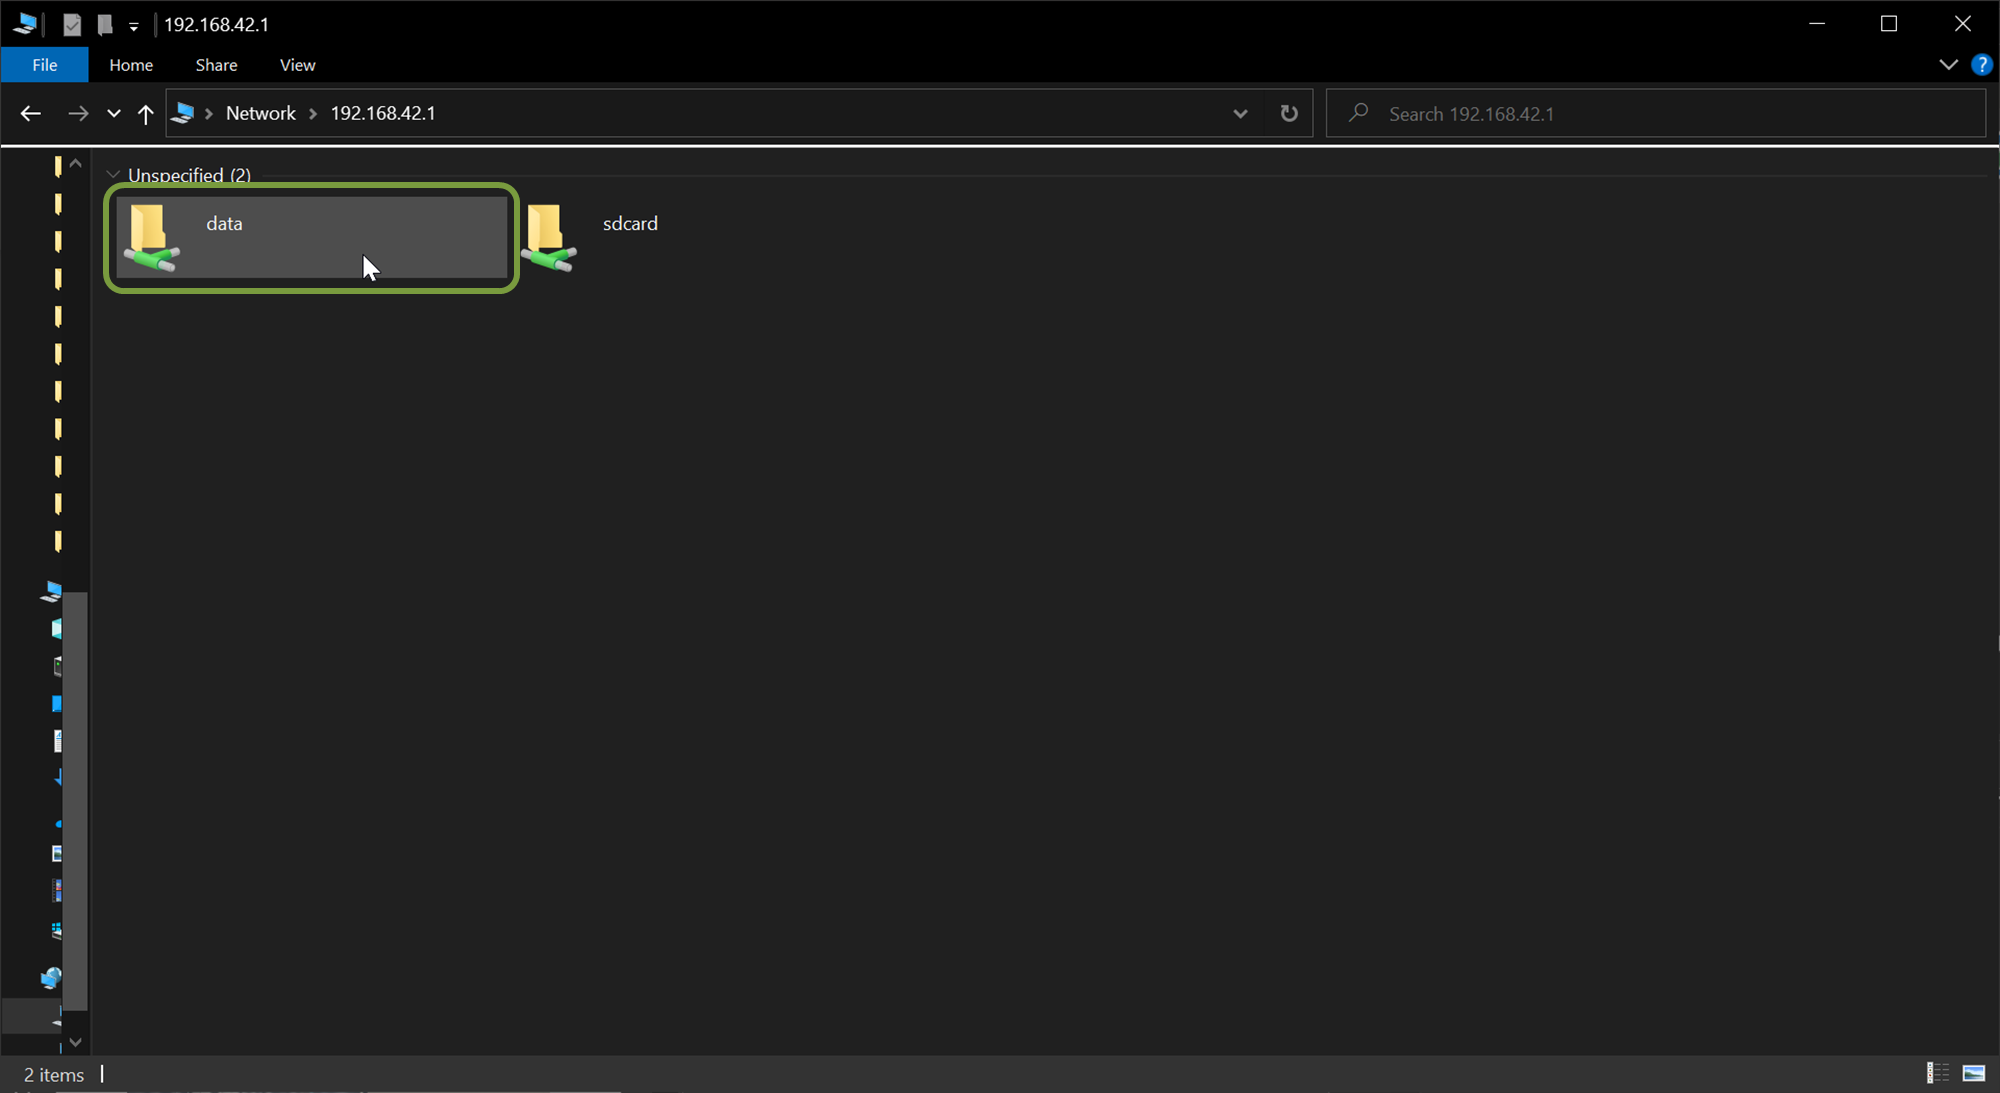
Navigate to the 6X internal storage by typing \\192.168.42.1 into the address bar of the file browser and pressing enter.
The sensor may need a minute to fully boot before it can be accessed via the file browser.
If the 6X can't be connected to after a few minutes try the following: - Turn off/disconnect any Wi-Fi or Ethernet connections that have internet access. - Verify the USB cable being used is the provided cable or one of the listed compatible cables.
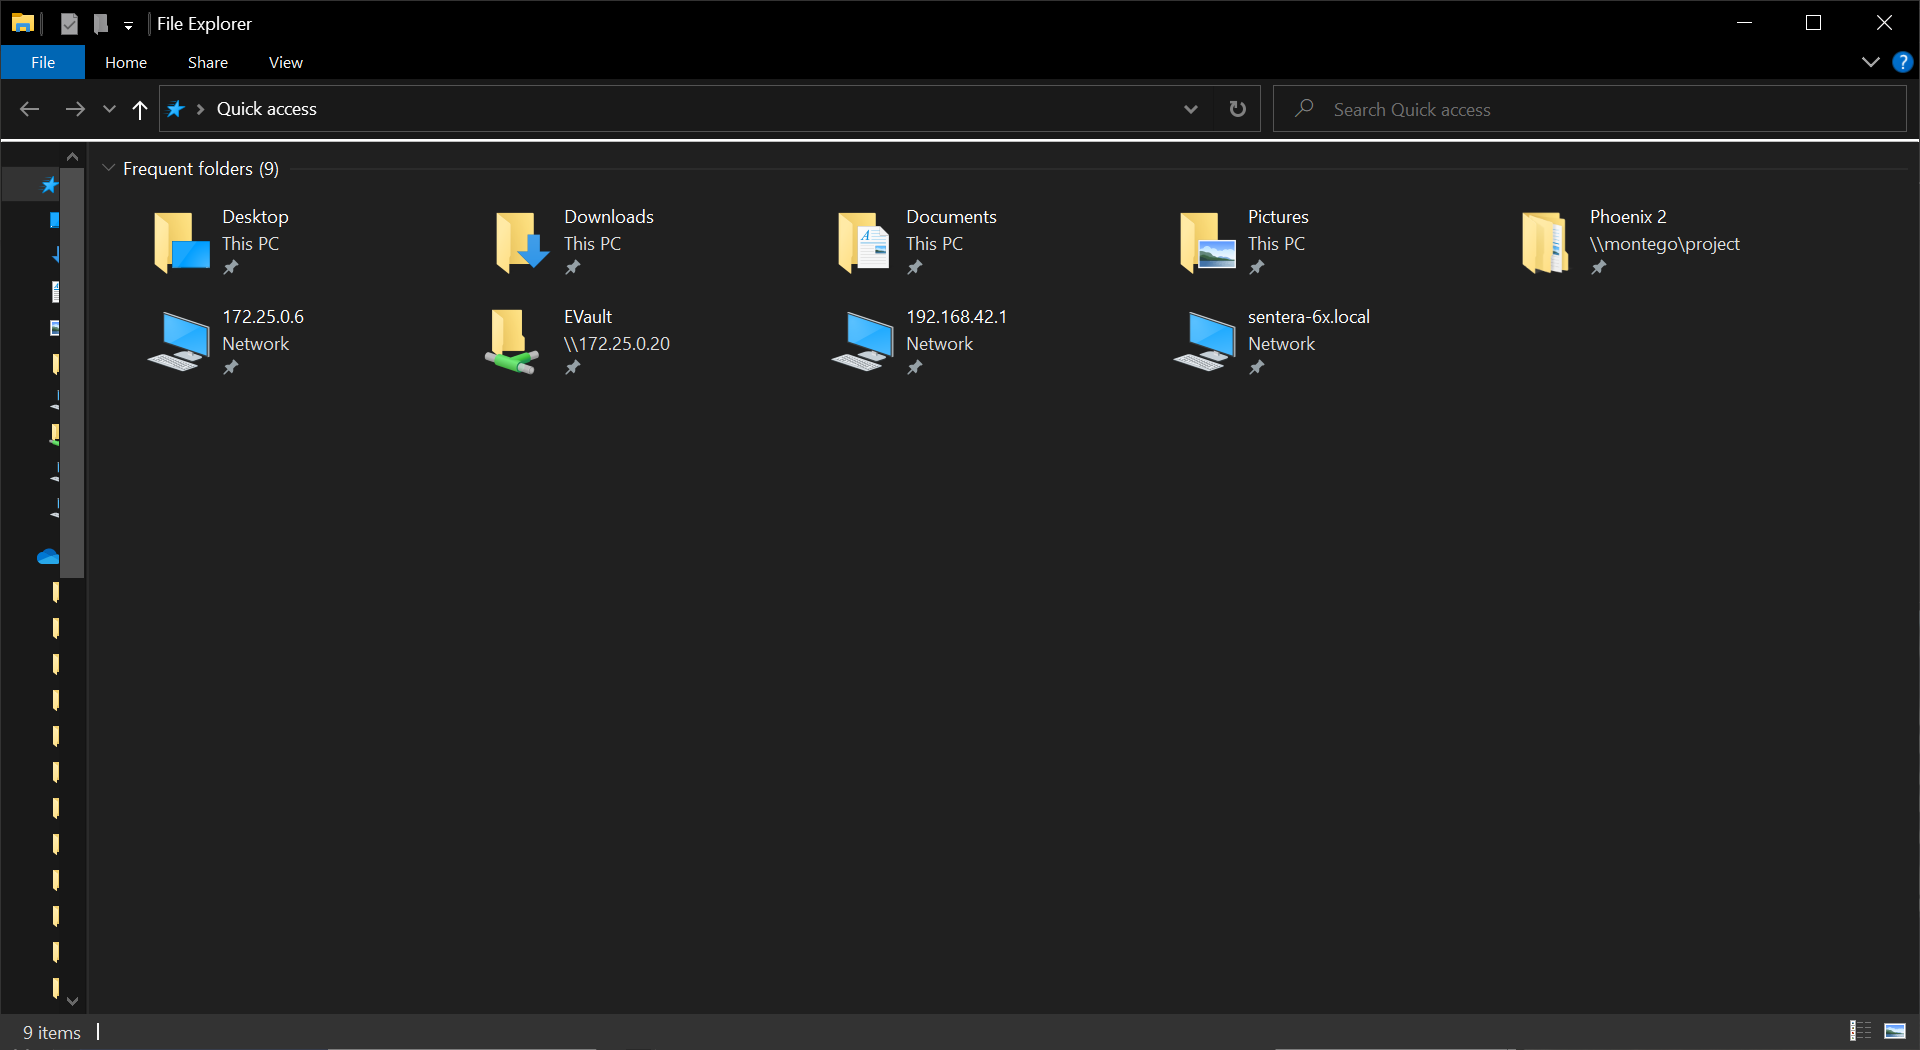
Adding this file path to Quick Access can be helpful for repeated use.
Windows will display a network credentials pop-up. The user name is sentera and there is no password. Press OK.
If your user account is controlled by a domain .\sentera may need to be used as the username.
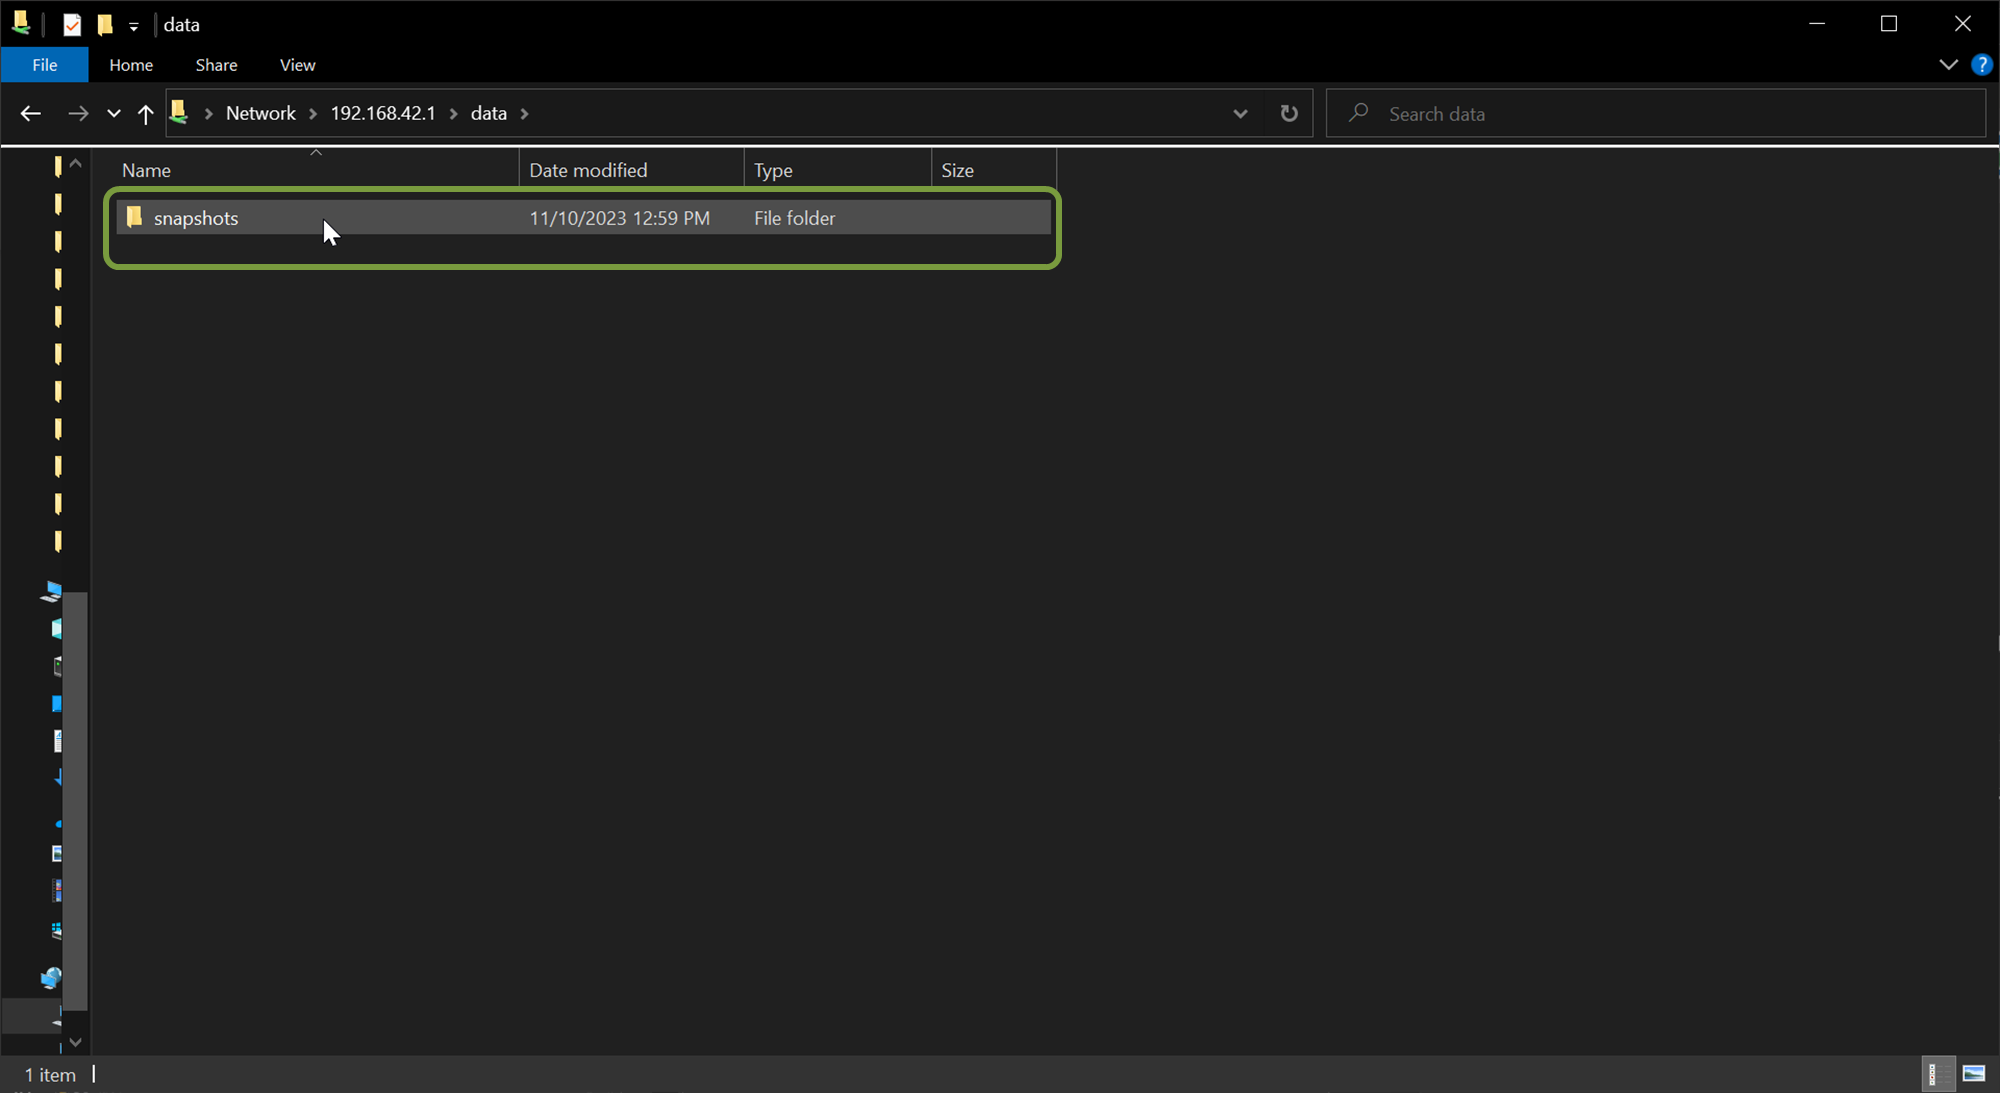
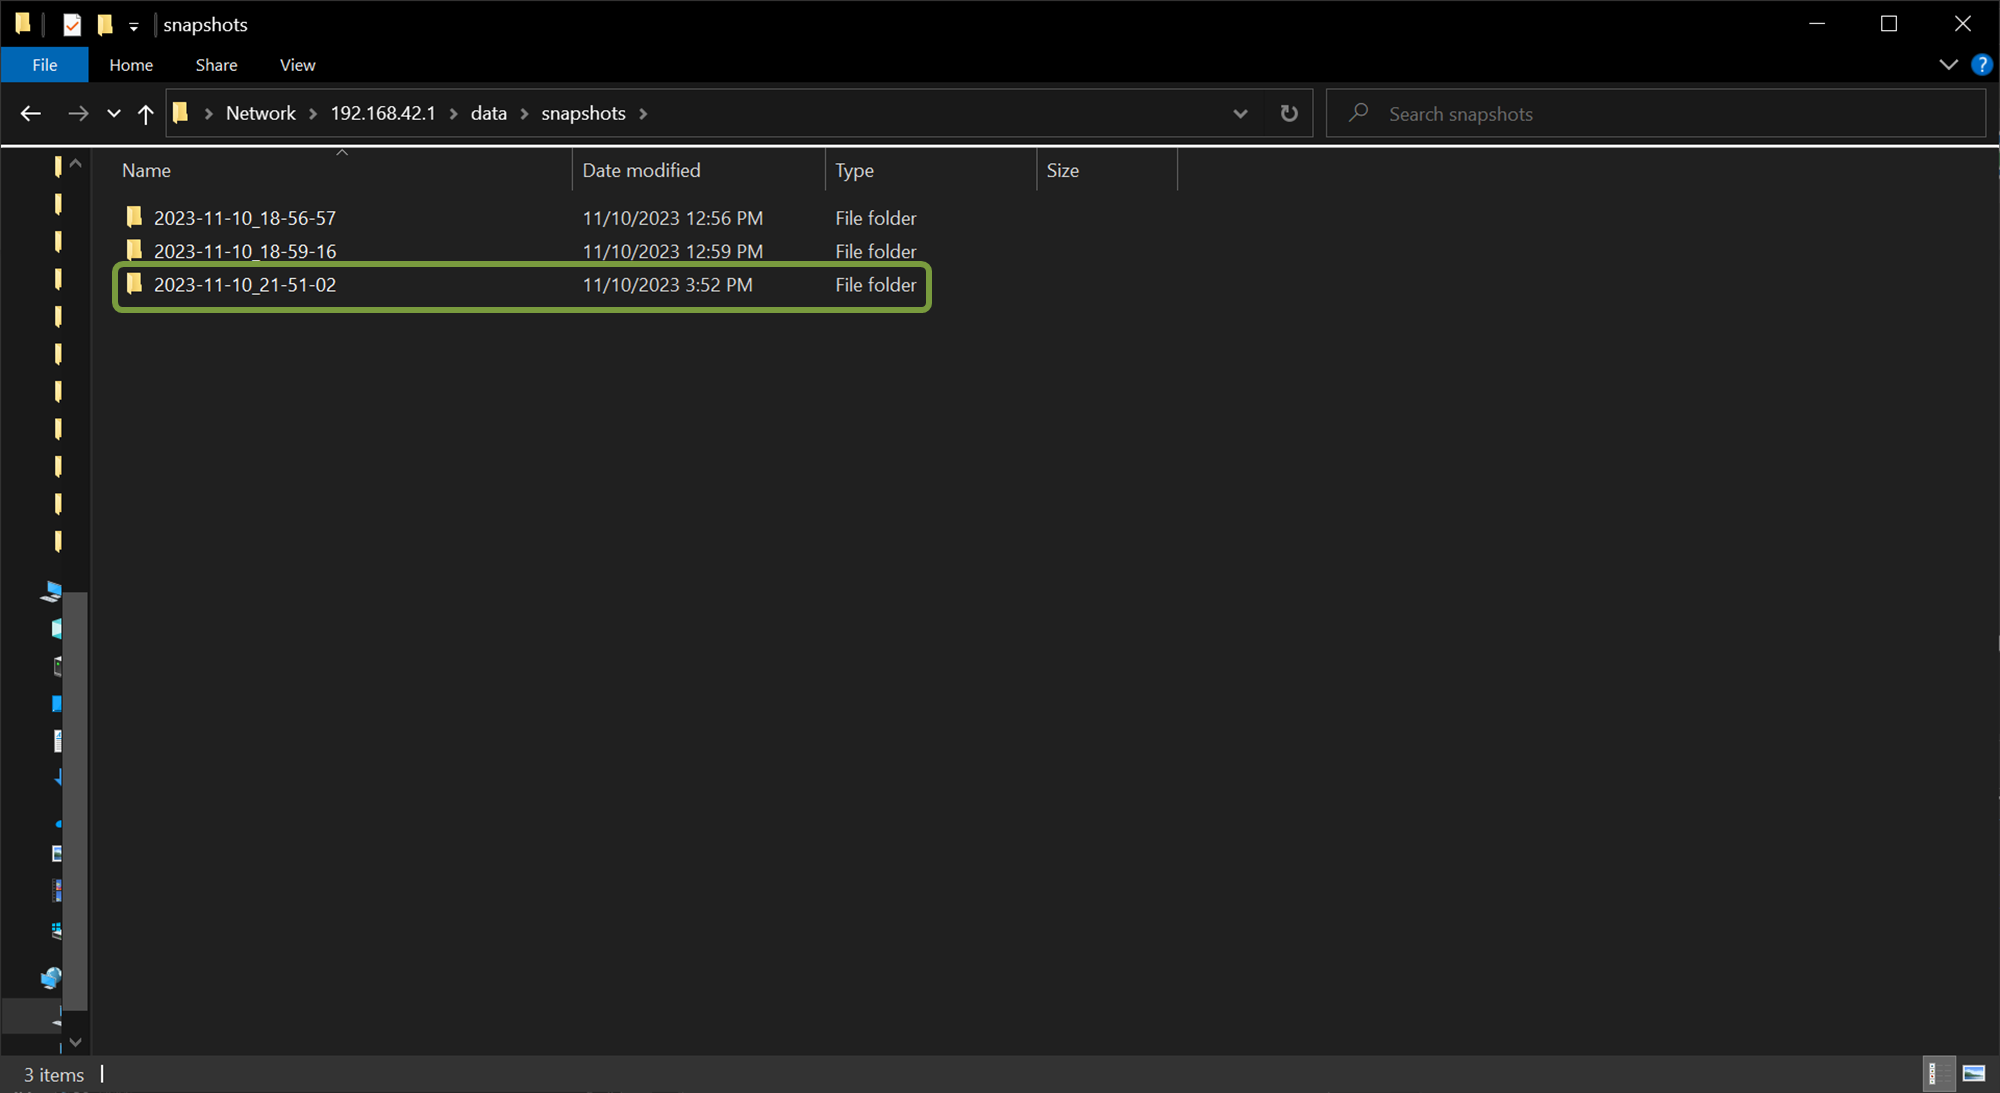
Session folders are the folders where the imagery is stored for each flight.
If the 6X is not power cycled between flights that are intended to be separate (i.e. not a battery swap) all of the photos from both flights will be stored in the same session folder.
6X Multispectral Sensor Data Offload For MacOS
The 6X stores the imagery on an internal solid state hard drive that is not removeable from the sensor. Use the process outline below to access the collected data.
Imagery is NOT stored on the micro SD card.
Power the 6X using the AC adapter or keep it attached to the aircraft and turn the aircraft on.
When using the AC power supply, connect the cable to the 6X first, then connect the adapter to the outlet.
Once the 6X is fully booted it will appear as a network location in the left hand menu of the Finder window.
If the 6X doesn't automatically show up, select the Network option under Locations, as it may appear there the first time the 6X is connected.
If there is a SENTERA-6X-SMB as well, select SENTERA-6X.
If the 6X can be connected to after a few minutes try the following: - Turn off/disconnect any Wi-Fi or Ethernet connections that have internet access. - Verify the USB cable being used is the provided cable or one of the listed compatible cables.
Select the 6X location and then select the data folder.
Session folders are the folders where the imagery is stored for each flight.
If the 6X is not power cycled between flights that are intended to be separate (i.e. not a battery swap) all of the photos from both flights will be stored in the same session folder.
Use the eject button to release the sensor from the OS. This provides the best reliability.